
Building the perfect loadout in Call Of Duty Black Ops 7 can make or break your multiplayer performance. With an expanded weapon customization system and new perk mechanics, knowing which combinations deliver maximum effectiveness becomes crucial for competitive success. Whether you're pushing objectives aggressively or holding down lanes defensively, the right loadout transforms good players into unstoppable forces.
Dominant Assault Rifle Loadouts
M15 Mod 0: The Reliable Workhorse
The M15 Mod 0 remains the gold standard for balanced performance across all situations. Its predictable recoil pattern and solid damage output make it perfect for players developing their fundamental skills while still being competitive at higher levels.
Optimal Attachment Setup:
- Optic: Lethal Tools ELO
- Muzzle: Redwell 5.56 Compensator
- Barrel: 16.5" Fusion Barrel
- Underbarrel: Ironhold Angled Grip
- Magazine: Mayday Extended Mag
- Rear Grip: Peregrine Grip
- Stock: Wander-3V Stock
- Laser: 3mW Motion Strike Laser
This configuration prioritizes recoil control and range extension while maintaining snappy handling characteristics. The compensator eliminates most vertical kick, while the angled grip handles horizontal bounce effectively.
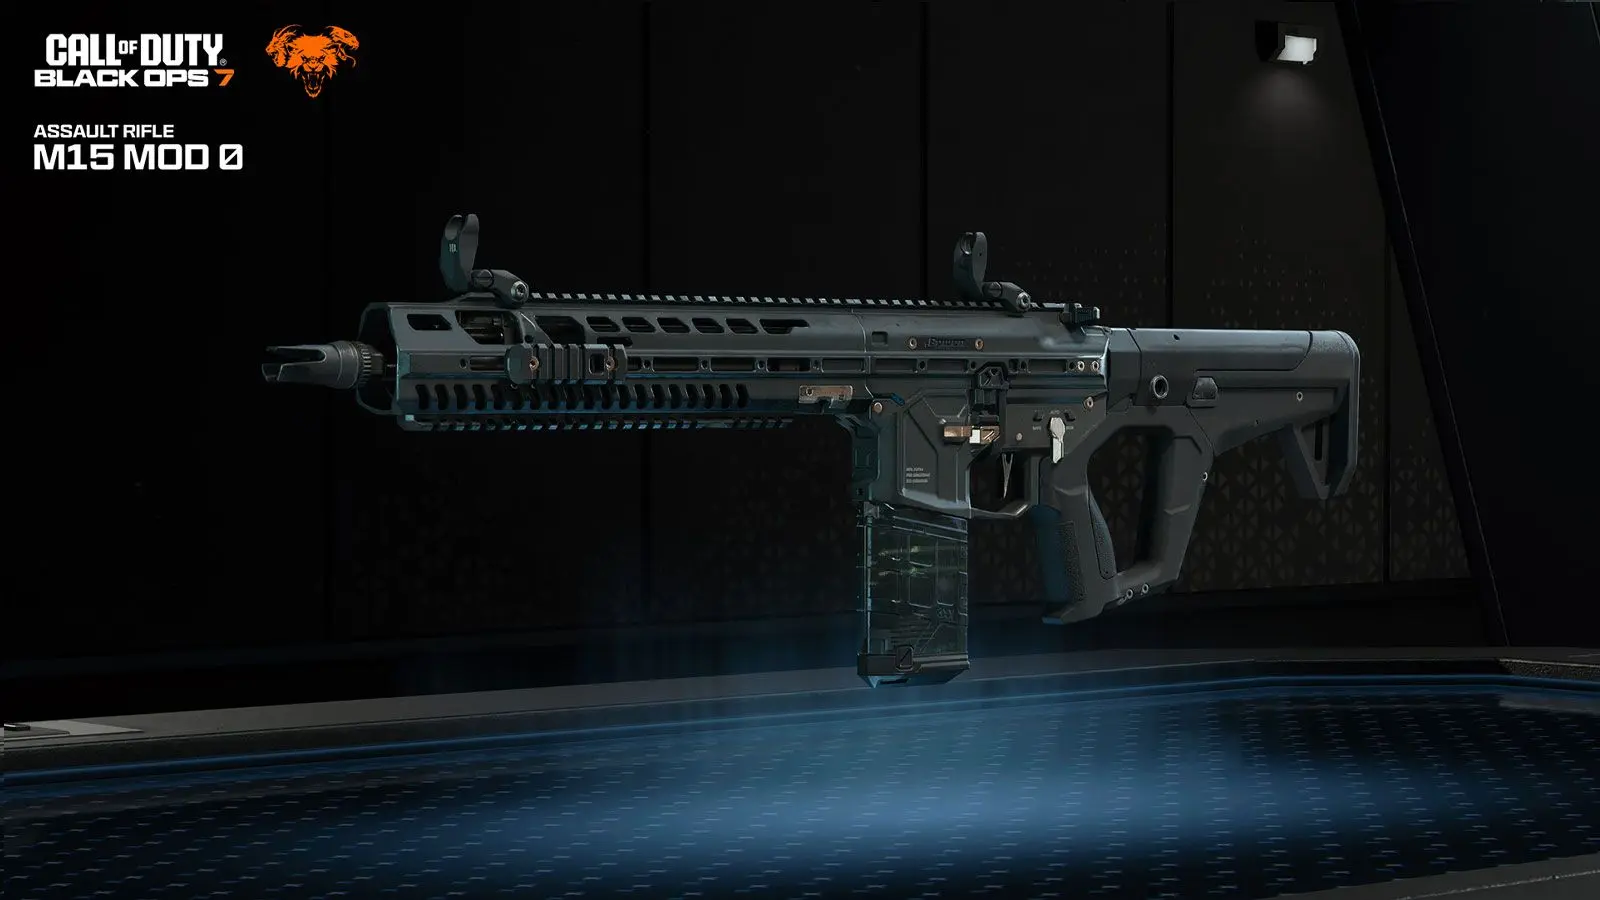
M15 Mod 0 attachment configuration for optimal performance
AK-27: High-Risk, High-Reward Power
For players who prioritize raw damage over ease of use, the AK-27 delivers devastating stopping power. However, its aggressive recoil demands careful attachment selection and disciplined trigger control.
Damage-Focused Build:
- Muzzle: Muzzle Brake
- Barrel: Damage Barrel
- Underbarrel: Recoil Control Foregrip
- Rear Grip: Quickdraw Grip
- Stock: Control Stock
This setup maximizes headshot potential while mitigating the weapon's natural instability. The damage barrel significantly increases headshot multipliers, making precise aim incredibly rewarding.
Warning
The AK-27 requires consistent practice to master. New players should stick with the M15 until their aim develops.
SMG Loadout
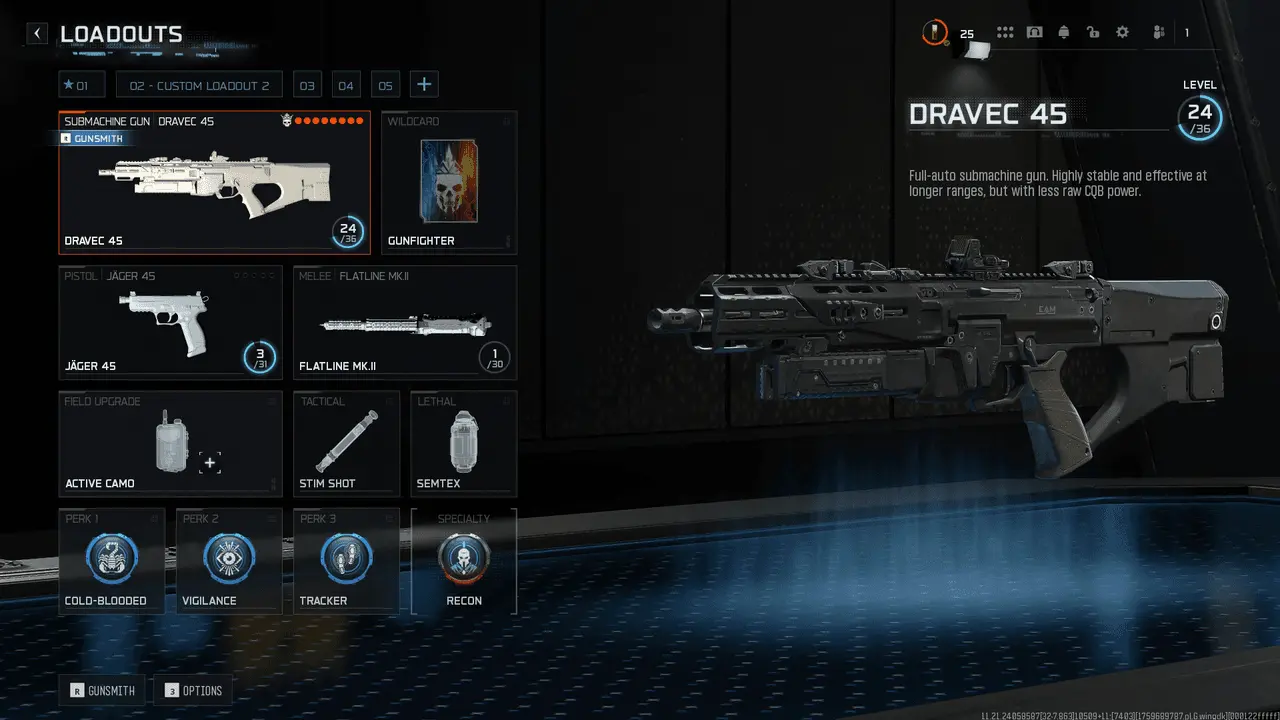
Dravec 45: The Range-Breaking SMG
Unlike traditional submachine guns, the Dravec 45 excels at medium-range engagements while maintaining close-quarters lethality. This unique positioning makes it invaluable for objective-based modes where engagement distances vary constantly.
Balanced Setup:
- Muzzle: Muzzle Brake
- Barrel: Long Barrel
- Magazine: Extended Mag I
- Rear Grip: Quickdraw Grip
- Fire Mods: Recoil Springs
The long barrel extends your effective range significantly, allowing you to challenge assault rifle users at distances where most SMGs become ineffective. Pair this with aggressive movement to create unpredictable angles of attack.
Specialized Weapon Combinations
Overkill Dominance: M8A1 + M10 Breacher
The Overkill wildcard enables devastating dual-primary setups that cover every possible engagement scenario. This particular combination gives you precision burst-fire capability alongside devastating close-range stopping power.
M8A1 Configuration:
- Optic: Mini Reflex 03
- Muzzle: Compensator
- Underbarrel: Steady Sway Handstop
- Rear Grip: Quickdraw Grip
- Fire Mods: Recoil Springs
M10 Breacher Setup:
- Muzzle: ADS Choke
- Barrel: Long Barrel
- Stock: Primed Stock
- Laser: Tactical Laser
- Fire Mods: Incendiary Ammo
This loadout requires aggressive positioning and quick weapon swapping. Use the M8A1 for medium-range picks, then immediately switch to the shotgun when enemies close distance.
Perk Synergies and Specialty Selection
The Mobility Meta: Lightweight + Dexterity + Fast Hands
Movement speed determines survival in Black Ops 7's fast-paced environment. This perk combination creates a highly mobile operator capable of outmaneuvering opponents consistently.
Core Benefits:
- Lightweight: Increased base movement speed and enhanced slide/dive distance
- Dexterity: Full ADS capability during slides, dives, and wall-jumps
- Fast Hands: Faster weapon swaps and reload speeds
The Enforcer specialty activates when combining these perks, granting temporary speed boosts and enhanced health regeneration after each elimination. This creates a snowball effect where successful engagements make subsequent fights easier.
Optimal perk configuration for maximum mobility advantage
Stealth Operations: Ghost + Tracker + Blast Link
For players who prefer tactical approaches over brute force, this stealth-focused combination provides superior battlefield awareness while keeping you hidden from enemy detection systems.
Intelligence Advantages:
- Ghost: Immunity to UAV and Scout Pulse detection while moving
- Tracker: Enemy footprint visibility and automatic ping system
- Blast Link: Explosive damage marks enemies for your entire team
The Recon specialty enhances your information-gathering capabilities, showing nearby enemy directions and providing edge-of-screen threat indicators. This setup excels in objective modes where map control matters more than raw fragging power.
Important
Stealth builds require patience and positioning awareness. Rushing blindly negates most of their advantages.
Equipment and Field Upgrade Optimization
Active Camo Mastery
Active Camo remains the most versatile field upgrade, providing tactical repositioning opportunities and ambush potential. The Recloak overclock transforms it from a one-time escape tool into a sustained harassment device.
Advanced Tactics:
- Activate before entering contested areas
- Fire at enemies to reveal positions
- Use Recloak to vanish during reload animations
- Reposition behind cover for follow-up attacks
Stim Shot Sustainability
Stim Shot with the Performance Boost overclock creates a powerful sustain tool that keeps aggressive players in the fight longer. The movement speed bonus synergizes perfectly with mobility-focused builds.
Field upgrade selection optimized for aggressive playstyles
Advanced Loadout Strategies
Map-Specific Adaptations
Different maps require different approaches. Long-range environments favor precision weapons with optical attachments, while close-quarters maps reward mobility and rapid-fire capabilities.
Nuketown Optimization:
- Prioritize SMGs and shotguns
- Focus on movement-enhancing perks
- Use explosive equipment for area denial
Babylon Adaptations:
- Emphasize assault rifles and marksman rifles
- Include range-extending attachments
- Consider defensive field upgrades
Game Mode Considerations
Your loadout should complement your team's objectives rather than purely maximizing individual performance. Check out our Call Of Duty Black Ops 7 All Co Op Campaign Missions guide for cooperative strategies that translate well to multiplayer teamwork.
Hardpoint Builds: Focus on area denial and sustained damage output
Search and Destroy: Prioritize stealth and precision over raw firepower
Team Deathmatch: Maximize individual fragging potential with aggressive setups
Loadout Evolution and Adaptation
The meta constantly shifts as players discover new combinations and developers implement balance changes. Stay flexible with your builds rather than committing permanently to any single setup. For the latest developments, our Call Of Duty Black Ops 7 Deep Dive covers emerging trends and professional insights.
Pro Tip: Save multiple loadout variations for different situations. Having pre-built options for various maps and modes saves valuable time during matches.
Multiple saved loadout configurations for different scenarios
Mastering Black Ops 7 loadouts requires understanding the intricate relationships between weapons, attachments, perks, and equipment. The combinations covered here provide solid foundations, but experimentation leads to personal optimization. Remember that the best loadout adapts to your playstyle rather than forcing you to adapt to it. Start with these proven configurations, then modify them based on your performance and preferences.
For additional insights into the game's broader systems, explore our Call Of Duty Black Ops 7 Beginners Guide to understand how loadouts fit into the complete Black Ops 7 experience.