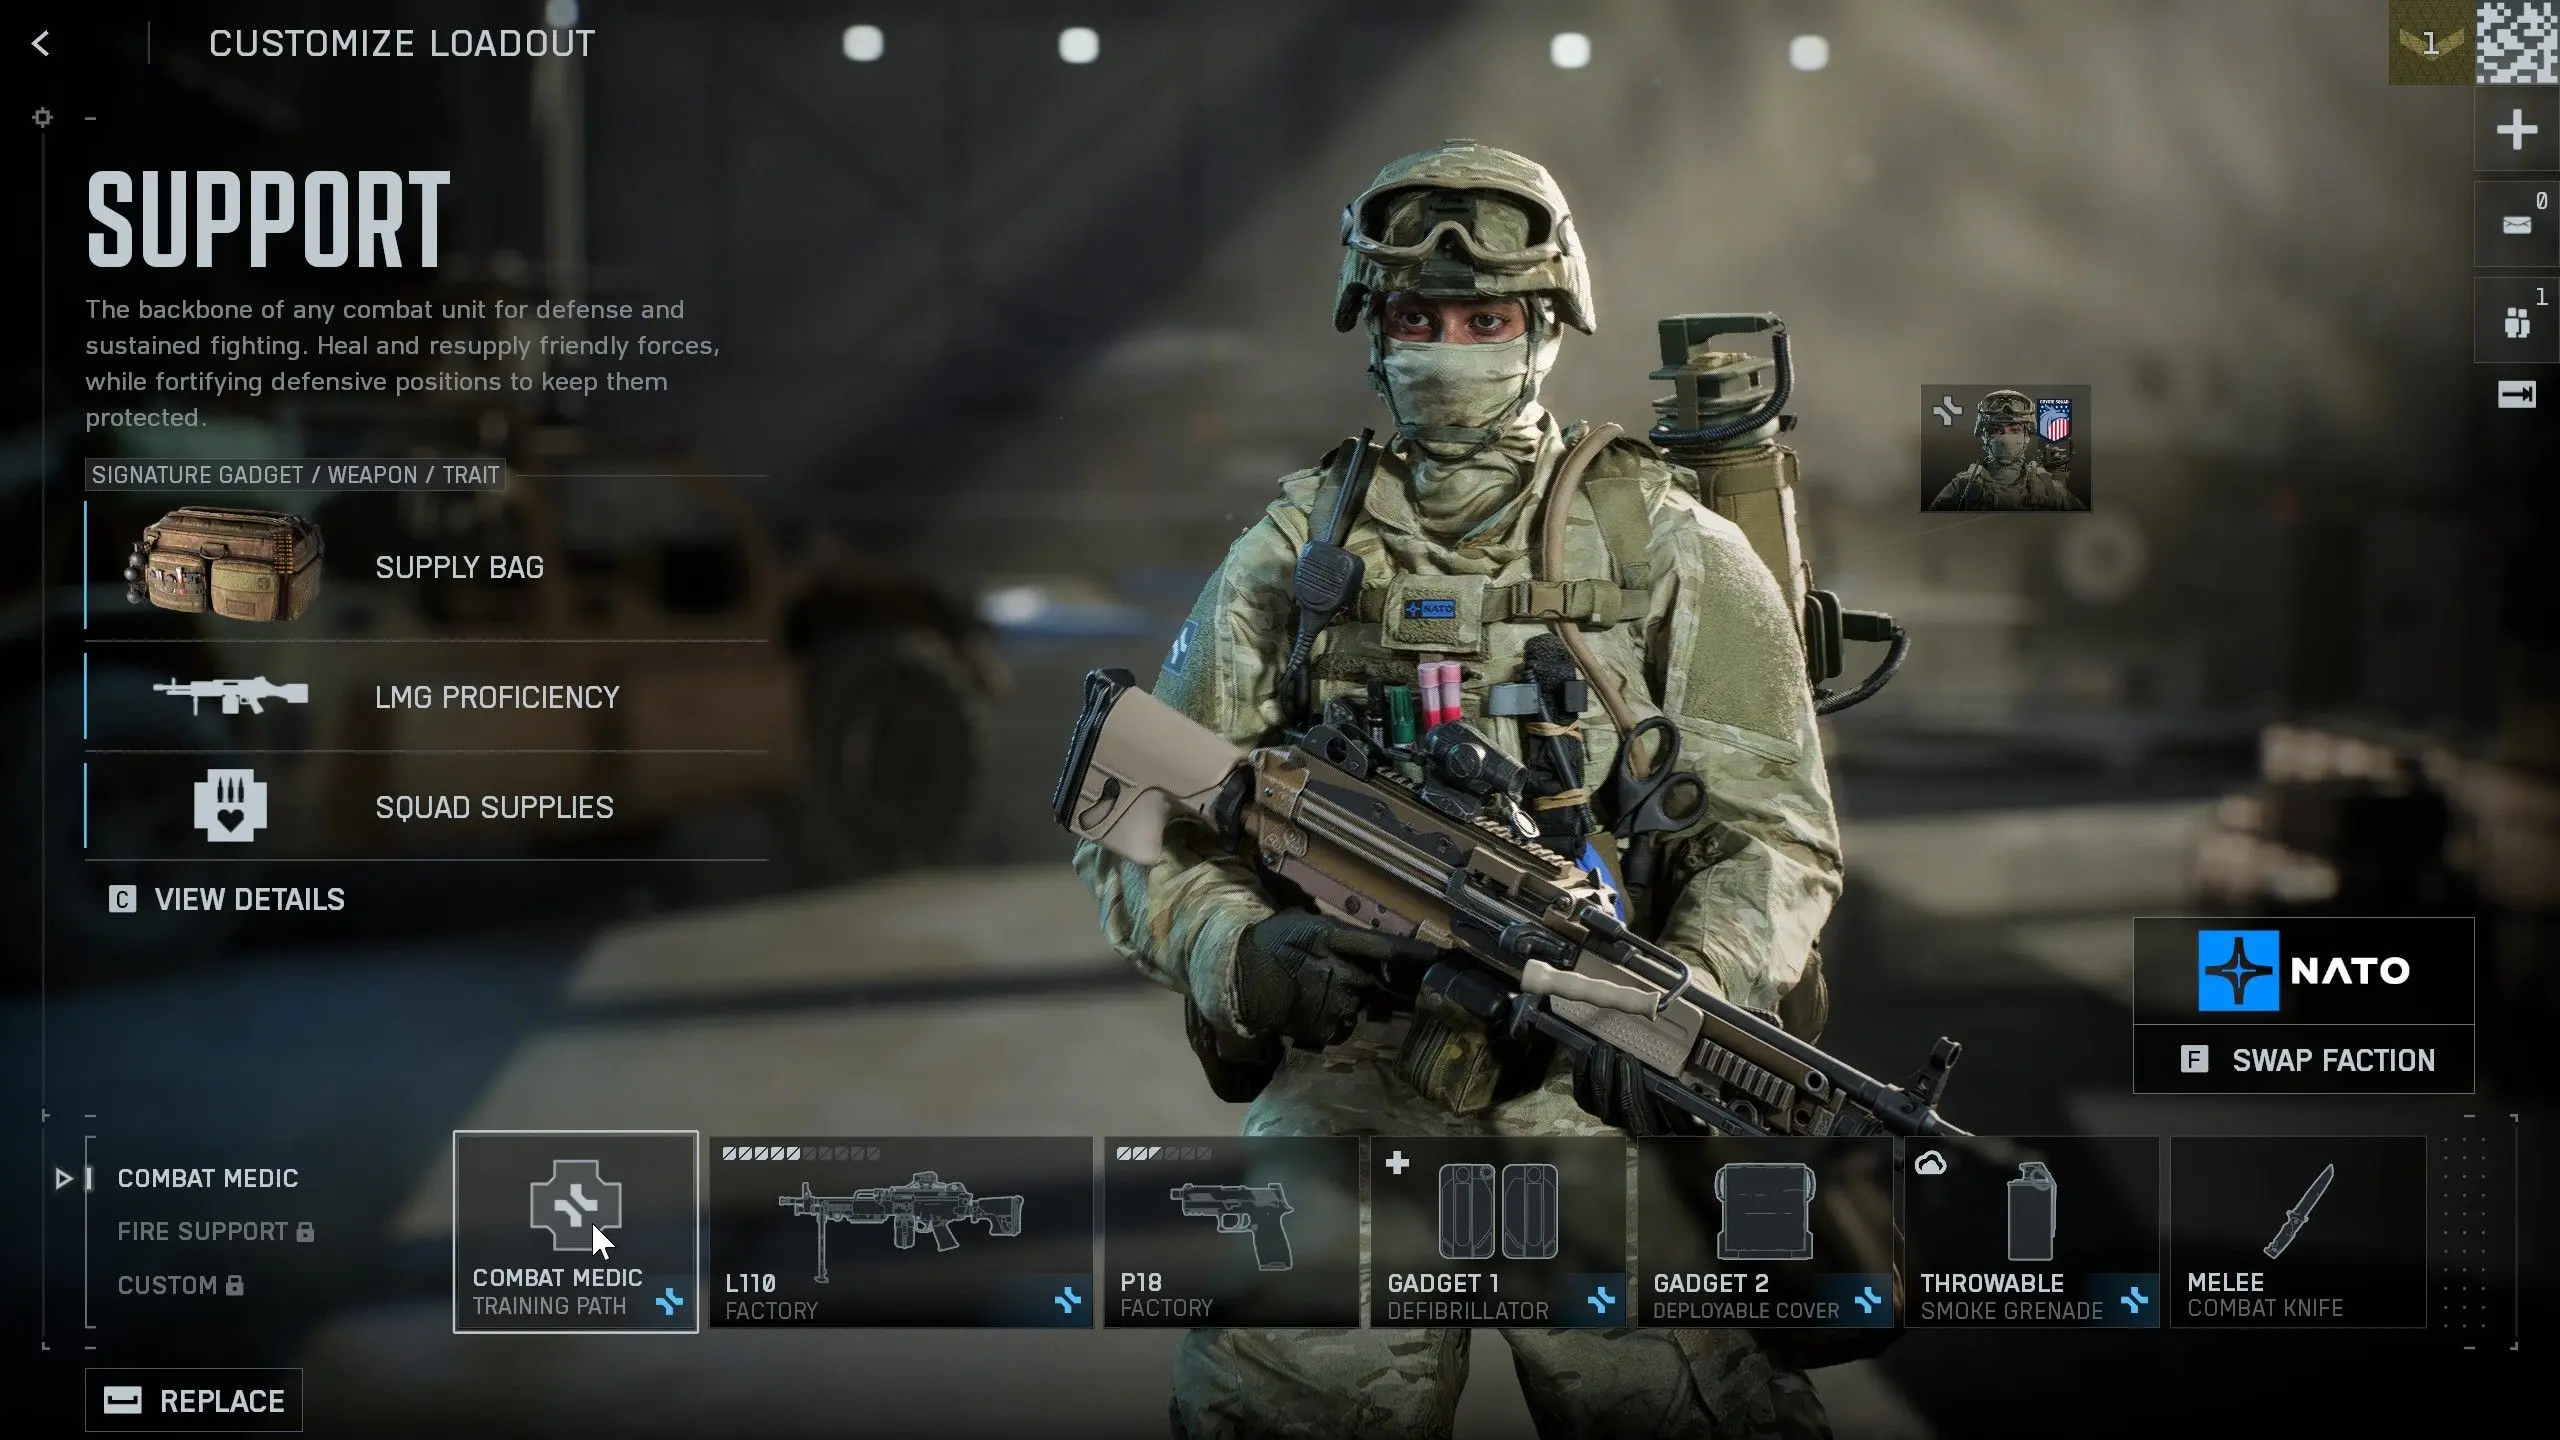

The Support class in Battlefield 6 transforms you into the backbone of your squad, wielding devastating LMGs while keeping teammates alive through crucial revives and medical support. Whether you're laying down suppressive fire or rushing to save fallen allies, mastering this versatile class can single-handedly turn the tide of battle.
What sets Support apart isn't just the firepower - it's the unique combination of heavy weaponry without movement penalties and life-saving abilities that make you invaluable in any game mode. You'll excel at holding chokepoints, providing covering fire, and ensuring your team maintains momentum through strategic revivals.
Battlefield 6 Best Loadouts for Support Class
Why Choose the Support Class?
The Support class offers three distinct advantages that make it a powerhouse choice. First, you're the only class exempt from LMG movement penalties, meaning you can sprint at full speed while carrying the heaviest weapons in the game. This mobility advantage is game-changing when repositioning or pursuing objectives.
Second, your quick revive ability activates faster than any other class, making you the ultimate battlefield medic. Combined with your natural tankiness, you can rush into danger zones to save teammates that others simply can't reach.
Finally, Support gains access to unique utilities like the Supply Bag and Deployable Cover, allowing you to create tactical advantages and sustain prolonged engagements that would drain other classes.

Battlefield 6 Best Loadouts for Support Class
Support Class Perks
Understanding your passive abilities is crucial for maximizing effectiveness. Steady Aim dramatically improves weapon accuracy when mounted, turning any cover into a devastating firing position. This perk synergizes perfectly with LMGs, which excel at sustained fire from fixed positions.
Explosives Resistant provides 25% explosive damage reduction, keeping you alive in the chaos of objective fights where grenades and rockets fly constantly. This survivability boost is especially valuable when reviving teammates under fire.
Revive Recovery triggers health regeneration and grants one second of damage immunity after each successful revive. This means you can chain multiple revivals in dangerous situations, creating incredible momentum swings for your team.
tip
Use Revive Recovery strategically by timing your revivals to gain temporary invulnerability during enemy pushes.
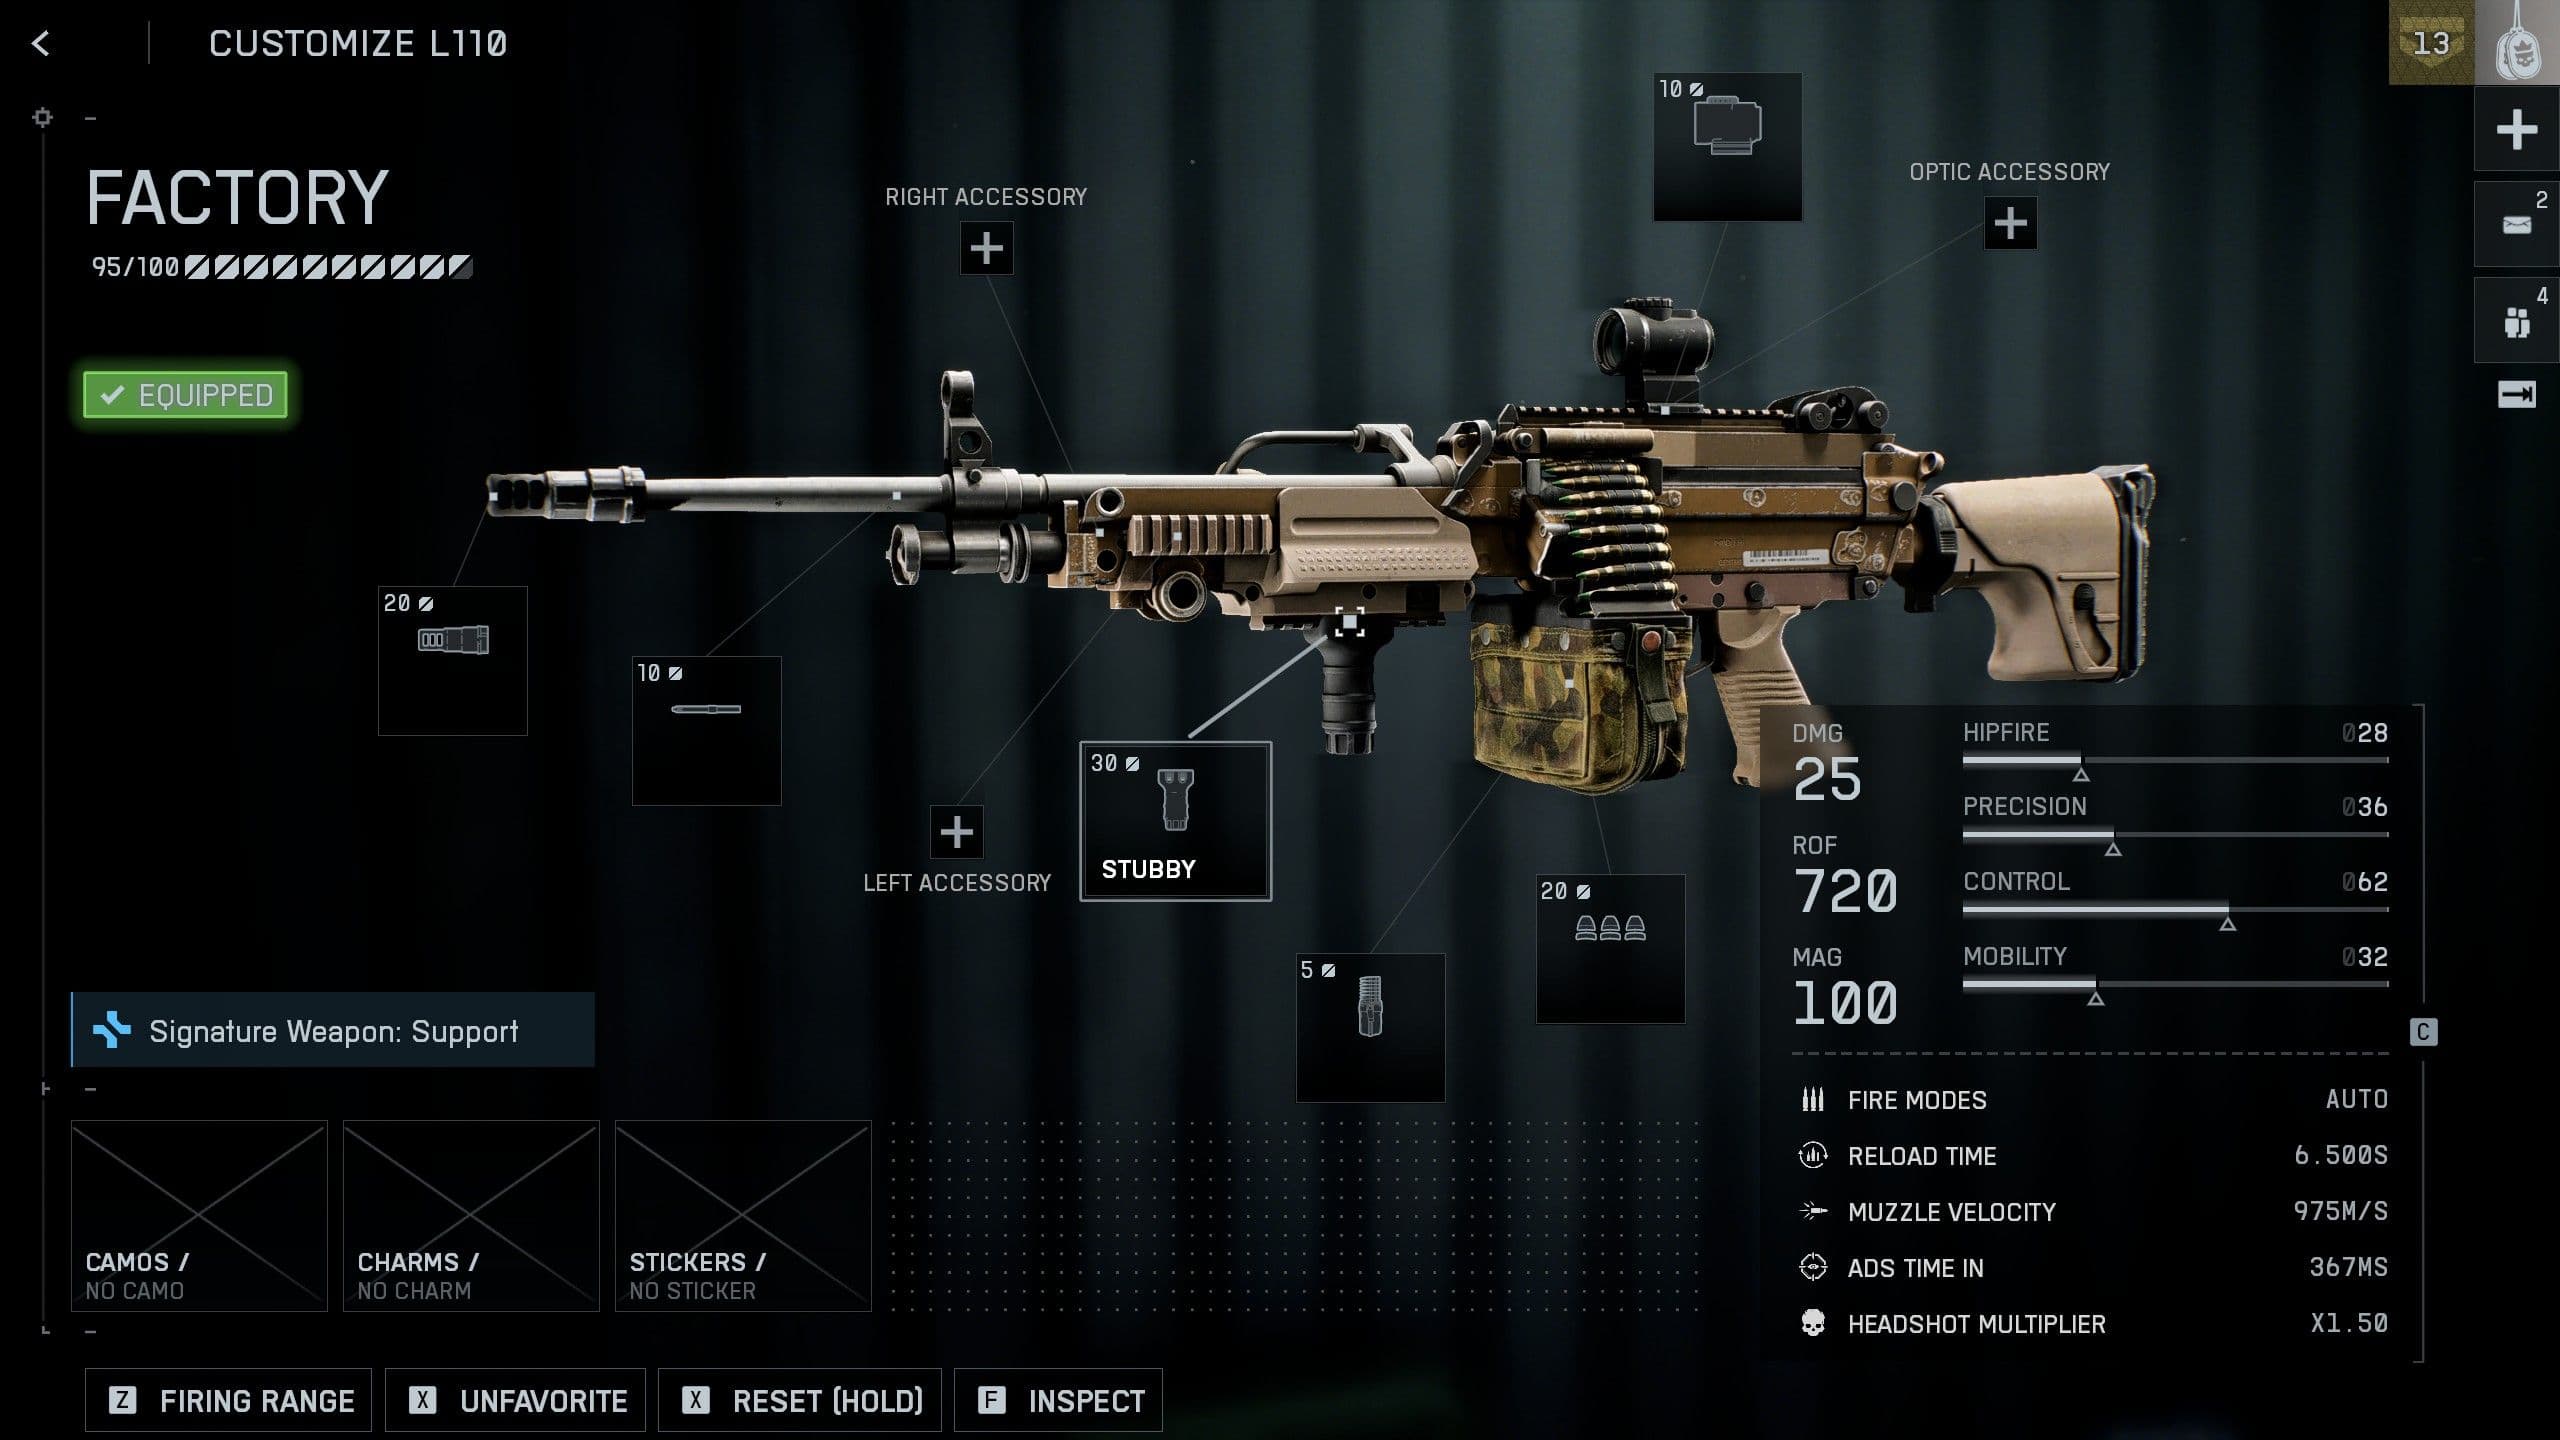
Best Primary Weapon: L110 LMG Build
The L110 LMG stands as the premier choice for Support players, offering exceptional damage output with manageable recoil when properly configured. This weapon excels in medium to long-range engagements while maintaining effectiveness in close-quarters combat.
Here's the optimal attachment setup:
This configuration transforms the L110 into a versatile weapon that handles both aggressive pushes and defensive holds. The Long Suppressor keeps you off enemy radar while reducing muzzle flash, crucial for maintaining stealth during flanking maneuvers.
Best Battlefield 6 L110 loadout | PC Gamer
Secondary Weapon: P18 Pistol Setup
Your sidearm serves as the crucial backup when your LMG runs dry during intense firefights. The P18 Pistol offers reliable close-range performance with these attachments:
- Optic: Mini Flex 1.00x for quick target acquisition
- Barrel: 3.9" Pencil Barrel for improved accuracy
- Magazine: 17RND Magazine for extended capacity
- Muzzle: Standard Suppressor for stealth
- Ammunition: Full Metal Jacket for penetration
This setup ensures your pistol remains effective when transitioning from your primary weapon during heated engagements.
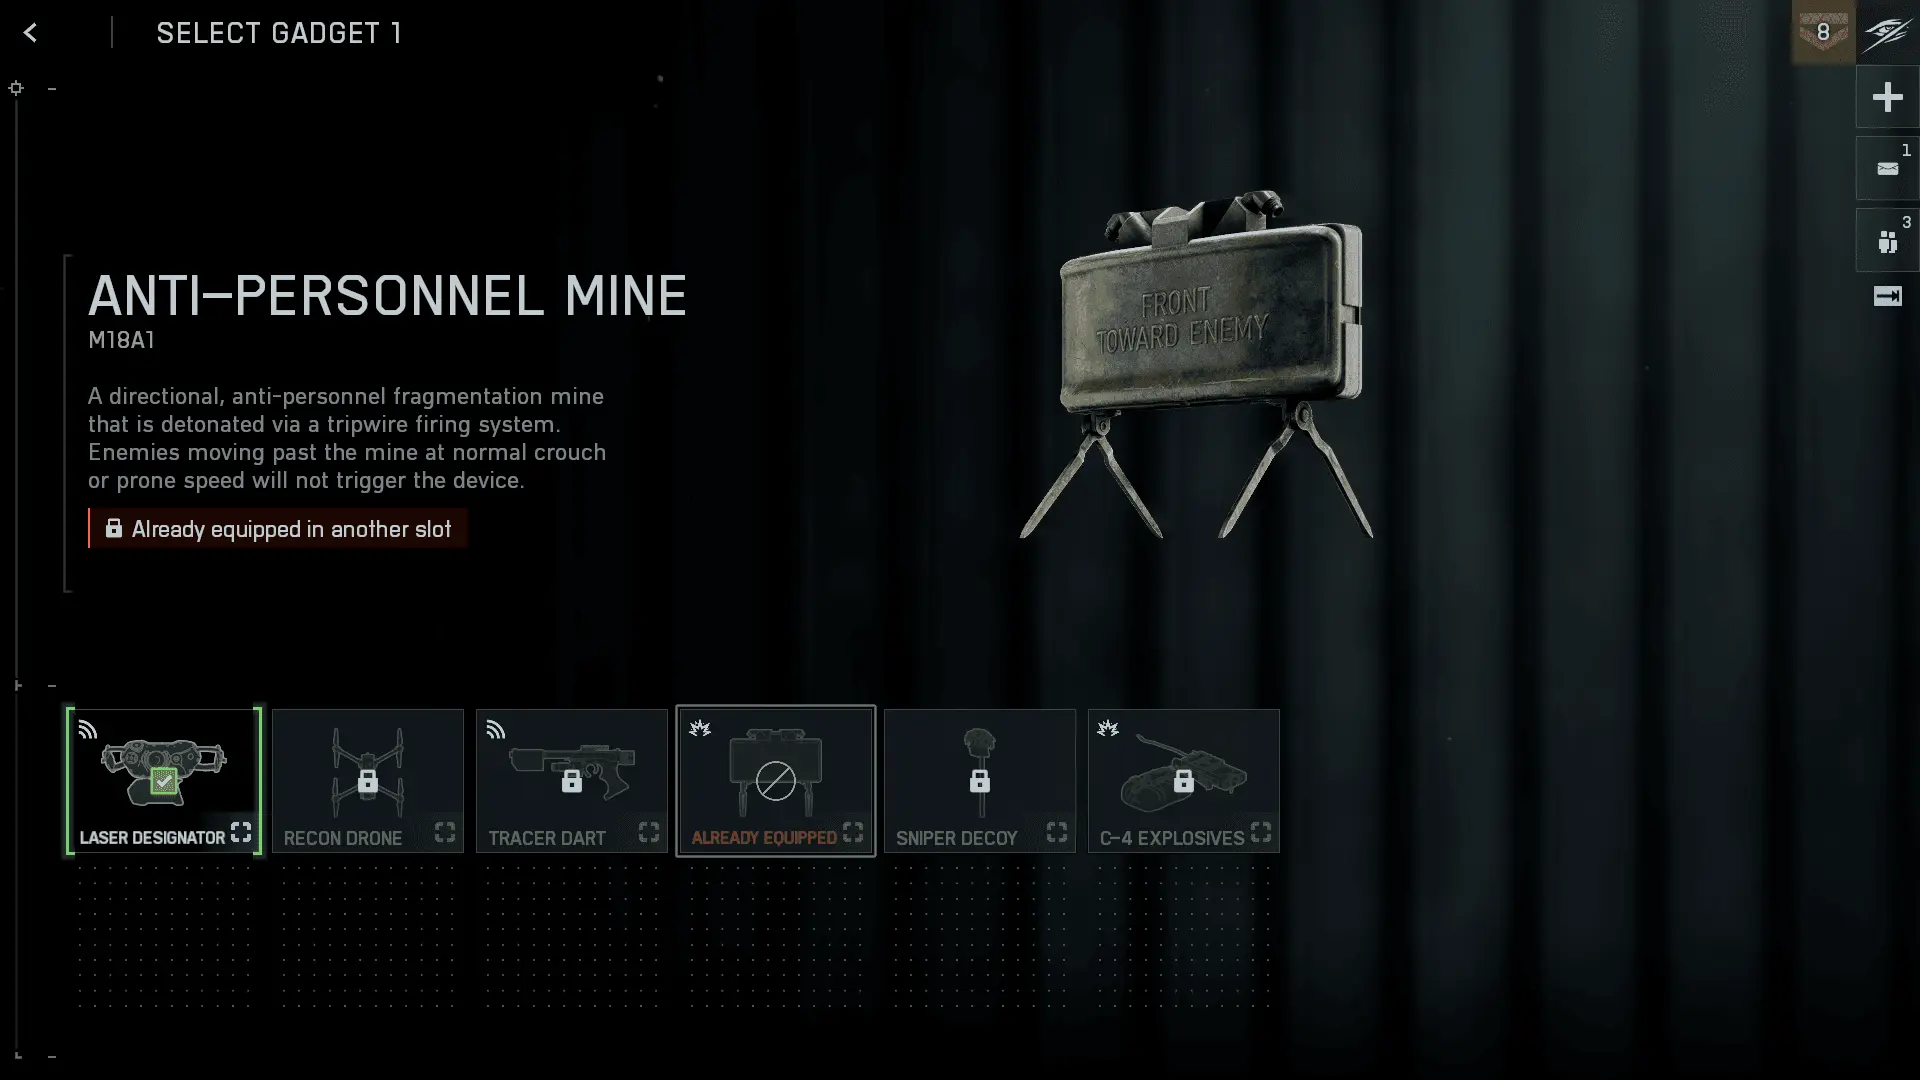
Gadget Selection Strategy
Your gadget choice defines your tactical role within the squad. The Supply Bag serves as your signature gadget, providing ammunition and medical supplies to teammates while offering personal sustainability during extended fights.
For explosive-heavy matches, consider the MP-APS (Active Protection System) to counter incoming grenades and rockets. This gadget creates a protective bubble around your position, invaluable when holding objectives under constant bombardment.
The Defibrillator maximizes your revival capabilities, allowing instant revivals that can completely shift battlefield momentum. Pair this with your natural quick-revive ability for unmatched life-saving potential.
important
Match your gadget selection to the game mode - Supply Bag for Conquest, Defibrillator for Breakthrough, and MP-APS for explosive-heavy scenarios.
Battlefield 6 Gadgets: All Class Tools ...
Combat Medic Training Path Optimization
The Combat Medic training path focuses on maximizing your life-saving potential while maintaining combat effectiveness. This specialization enhances your revival speed and grants additional medical benefits that make you nearly unstoppable in team-focused gameplay.
Key benefits include:
- Urgent Aid: Faster healing for revived teammates
- Enhanced Medical Training: Improved medical item effectiveness
- Battlefield Triage: Ability to assess teammate health status from distance
When running Combat Medic, prioritize positioning near your squad's frontline fighters. Your enhanced medical capabilities mean you can keep aggressive teammates in the fight longer than any other class.
Throwable Selection: Smoke Grenades
Smoke Grenades represent the optimal throwable choice for Support players. These tactical tools enable safe revivals, objective captures, and tactical repositioning that other throwables simply can't match.
Use smoke to:
- Create safe revival corridors in open areas
- Block enemy sightlines during objective pushes
- Facilitate team rotations across dangerous terrain
- Disrupt enemy defensive positions
warning
Avoid Frag Grenades as Support - your role focuses on sustainability and team support rather than explosive damage.
Advanced Positioning Tactics
Effective Support play revolves around strategic positioning that maximizes your LMG's strengths while enabling quick teammate assistance. Identify elevated positions with good sightlines across multiple engagement zones, allowing you to provide covering fire while maintaining revival accessibility.
Pre-aiming common angles becomes crucial with LMGs due to their slower ADS times. Learn popular enemy routes and pre-position your crosshair to minimize reaction time disadvantages.
When defending objectives, position yourself where you can cover multiple approach routes while staying within revival range of aggressive teammates. Your Deployable Cover can create impromptu defensive positions in otherwise exposed areas.
Team Coordination Tips
Communication transforms good Support players into exceptional ones. Call out enemy positions while providing covering fire, and coordinate with your squad to maximize revival opportunities during chaotic firefights.
Establish revival priorities with your team - prioritize medics and engineers who provide unique utilities, then focus on assault players who can capitalize on your life-saving efforts with aggressive pushes.
During objective captures, position yourself as the "anchor" - the stable firing position that teammates can fall back to for medical support and ammunition resupply.
The Support class rewards players who think tactically while maintaining aggressive firepower. Master these fundamentals, and you'll become the squad member everyone wants to fight alongside - the one who keeps the team alive while delivering devastating suppressive fire that controls entire battlefield sections.