

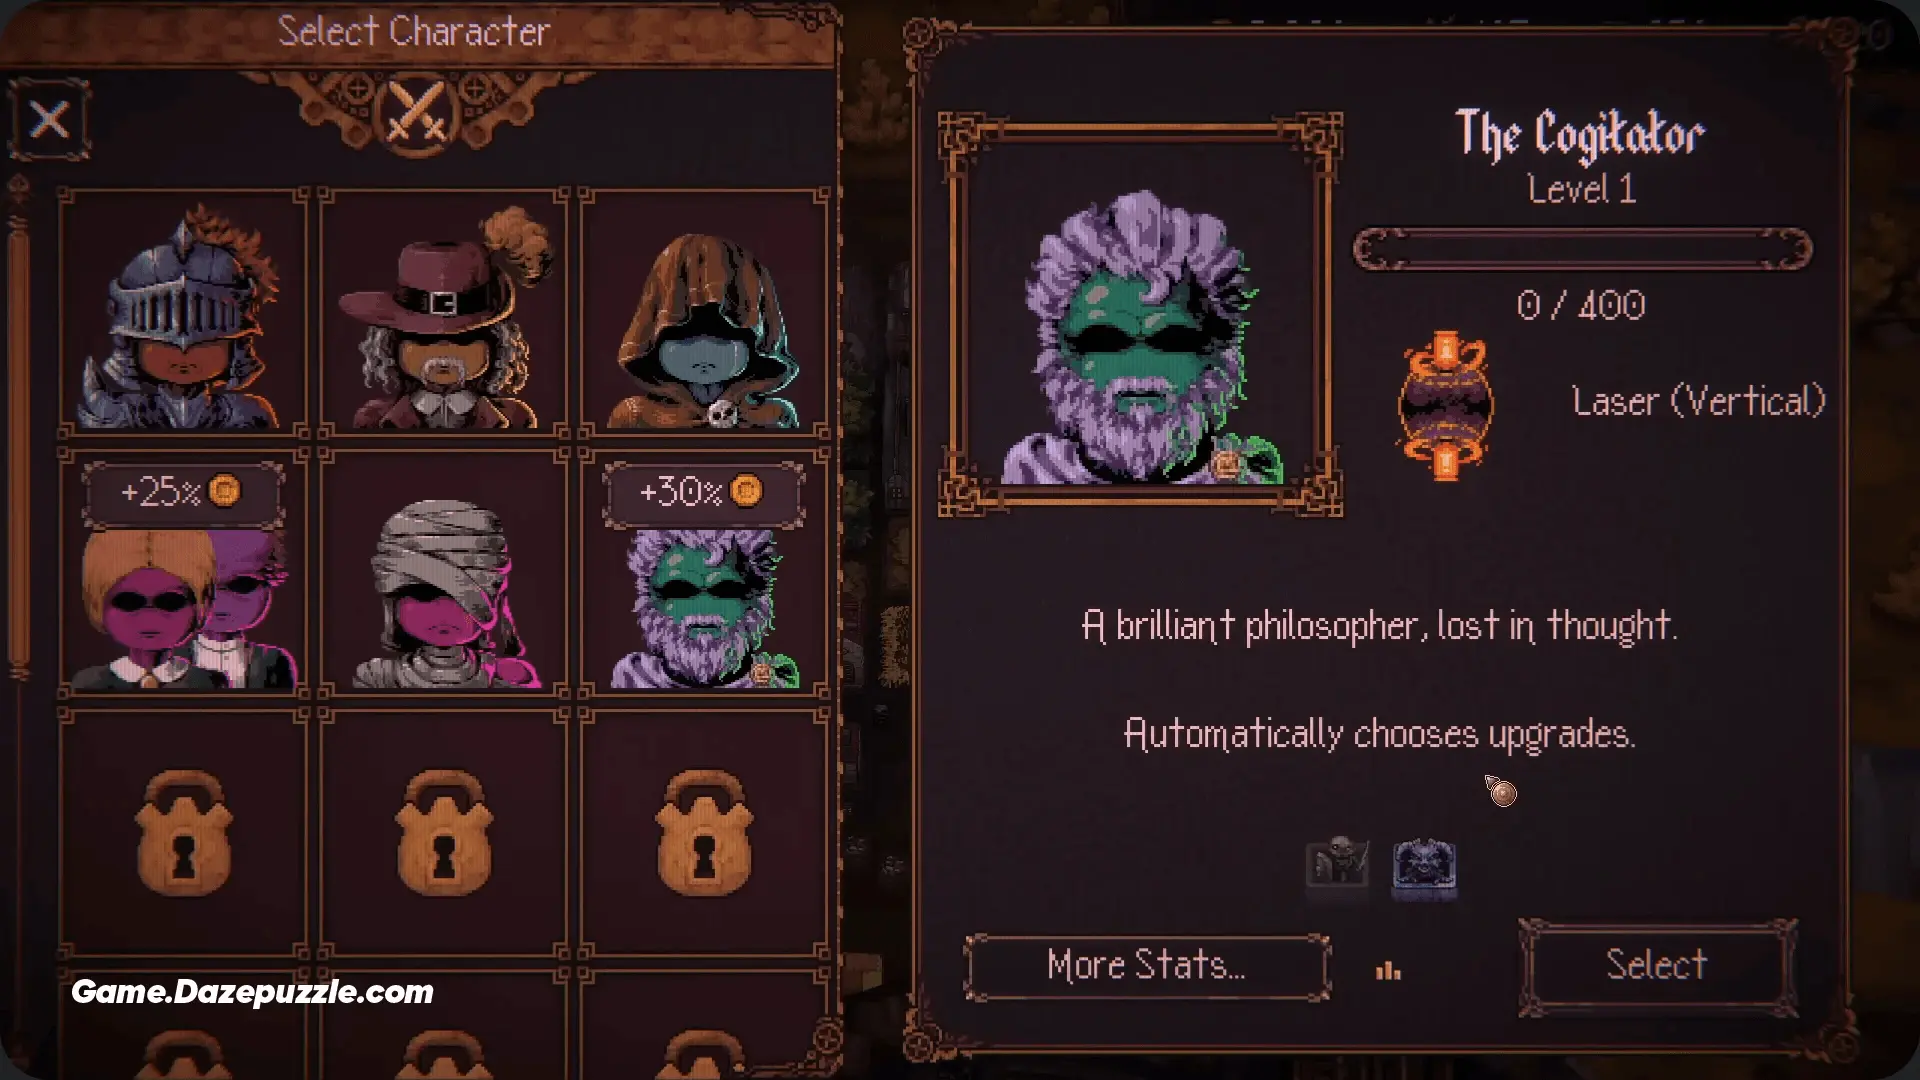
Choosing the right character in Ball x Pit can transform your entire run from struggling through early waves to steamrolling through endgame content. With 18 unique heroes each bringing distinct abilities and starting balls, understanding their strengths becomes crucial for consistent victories. This ranking breaks down every character's potential, from unstoppable S-tier powerhouses to experimental picks that reward dedicated mastery.
Ultimate Ball x Pit Character Tier List
S-Tier: Run-Defining Powerhouses
These characters consistently deliver exceptional performance regardless of RNG or build direction. They're perfect for both newcomers learning the game and veterans pushing deep runs.
The Pitling
The Pitling stands out for its rapid XP accumulation and early fusion access. This character smooths progression curves, letting you reach powerful combinations faster than any other hero. The Bleed starting ball provides consistent damage over time, making early waves manageable while you build toward fusion synergies.
Iron Fool
With exceptional defense stats and reliable damage output, Iron Fool excels at surviving extended encounters. Its Burn starting ball creates consistent area denial, while the character's inherent tankiness lets you take risks other heroes can't afford.
Lantern Knight
Lantern Knight offers steady fire damage that stacks beautifully with most fusion builds. New players appreciate its forgiving playstyle, while experienced runners value its consistent scaling and excellent control options.
The Itchy Finger
This character rewards aggressive positioning with rapid-fire shooting and constant movement capabilities. The Itchy Finger maintains full movement speed while attacking, creating a unique hit-and-run playstyle that generates massive DPS once mastered.
The Falconer (new)
The Falconer enters the roster as an immediate top-tier contender. Flanked by two falcons that actively throw balls, this character effectively increases ball output without relying on RNG or late-game scaling.
A-Tier: Specialized Excellence
These heroes perform exceptionally well with proper build planning and strategy. They offer high skill ceilings and rewarding gameplay for players willing to invest time in mastering their mechanics.
The Shade
The Shade shoots from back positions with a 10% base critical chance, creating opportunities for devastating burst damage. The Dark starting ball's instant-kill potential against weakened enemies makes this character excel in builds focused on piercing or critical damage amplification.
The Carouser (new)
The Carouser’s defining trait is that returning balls orbit around the character instead of immediately resetting. At first, this feels slightly awkward, especially if you’re used to clean front-line control. And then it clicks. The orbit creates a persistent damage zone that excels in mid-range control and crowd thinning. Builds that focus on multi-hit effects, bleed, burn, or on-hit passives gain extra value because balls stay active longer instead of disappearing.
The Repentant
This character gains 5% damage with each ball bounce, but balls return after hitting the back wall, damaging every enemy they cross. The Repentant rewards strategic positioning and benefits enormously from extended bounce paths that maximize damage stacking.
important
The Repentant's returning balls can save runs by clearing enemies that break through your main defense line.
B-Tier: Solid Performers
These characters handle most content reliably but may struggle in high-depth runs without strong fusion support or favorable map layouts.
Candlebearer
Candlebearer becomes consistent once you start managing multiple fusions simultaneously. This character rewards players who understand fusion timing and can juggle several ball types effectively.
The Empty Nester
The Empty Nester doesn't spawn baby balls but fires multiple special balls with each shot. While its ability currently has limitations, focused builds using manual leveling and Ghost or explosive fusions can create surprisingly powerful combinations.
The Flagellant
This character's balls bounce normally off the screen's bottom edge, creating unique positioning opportunities. The Flagellant benefits from bottom-wall bounces to maintain consistent pressure on enemy formations.
C-Tier: Situational Choices
These heroes depend heavily on RNG or specific passive abilities to remain effective in late-game scenarios. They're usable but require more effort to achieve consistent results.
The Cohabitants
Launching a ball creates another in the reverse direction dealing 50% damage. The Cohabitants provide early game fun with Brood Mother synergy, but the mirrored attacks lose impact as enemy scaling outpaces damage output.
The Juggler
The Juggler sends balls airborne to chosen field spots, starting bounces only when they reach the ground. This unique throw arc helps in open layouts but significantly slows early-game farming efficiency.
warning
The Juggler's precision targeting becomes difficult to manage during intense wave sequences.
D-Tier: Experimental Picks
These characters work for novelty runs or specific challenge attempts but require significantly more effort to remain competitive throughout full runs.
Echo Diver
Echo Diver's unpredictable ball trajectories make damage output inconsistent. While creative players can find niche applications, the character struggles with reliable performance.
Bone Harpist
This character relies on rhythm-based timing that becomes unreliable during heavy enemy waves. Bone Harpist offers unique gameplay but can't maintain effectiveness under pressure.
Character Unlocking Strategy
You unlock new characters by completing runs and earning blueprints. Build houses in your base to make characters available for selection. Focus on unlocking S-tier and A-tier heroes first to expand your strategic options.
Recommended Unlock Order
- The Pitling - Essential for learning fusion mechanics
- Iron Fool - Provides defensive safety net
- The Shade - Introduces advanced positioning concepts
- Hollow Maiden - Teaches sustain-based strategies
Fusion Synergy Considerations
Character choice should align with your preferred fusion strategies. The Shieldbearer excels with Iron or Burn balls, while The Embedded's poison pierce works beautifully with crowd-clearing fusions.
tip
Experiment with different character-fusion combinations to discover unexpected synergies that match your playstyle.
Final Character Selection Tips
Start with The Pitling or Iron Fool for consistent results across various run types. As you develop mechanical skills, graduate to characters like The Shade or The Repentant for higher risk-reward gameplay.
Remember that tier lists represent general performance trends, your personal success with any character depends on understanding their unique mechanics and building strategies around their strengths. The most important factor is finding heroes that match your preferred playstyle and practicing their specific techniques until they become second nature.